Search This Blog

Blog Archive

Showing posts with label SailRite. Show all posts

Saturday, January 7, 2017

Storage of Unwieldy Things Onboard


Preparing to install new battery bank below aft berth
As ever, I am on the lookout for ways to maximize our finite space aboard Northern Star and to make that available space easier to access. Over the past year and a half I have caught myself staring at the interior hull of the aft cabin, as if in a trance.  I was fixated on one long expanse of wood paneled wall curving out and up along the hull. Below that wall, on the aft cabin berth lay stacks of bulky and frequently quite long items that have to be stored somewhere on the boat.  

All manner of awkwardly shaped things are in there—the stiff unwieldy rain panel (we lost one in a wind storm) that zips onto the dodger, the helm station canvas, a really long fishing rod and reel, an 8’ long spear for lobster fishing, a long-handled boat brush, clothes washing “plunger,” shade tarp, a beach pop-up tent, wind scoops, covers for the Garmin instruments, a Loos* gauge, a “pigstick”**—all this extraneous stuff!  Stuff that doesn’t really belong anywhere in particular.  Stuff that wouldn’t have to be taking up space on a berth where a guest otherwise could sleep. But what to do with it? And all the while, there above the berth, staring at me, is that long bare wall……
Hanging sling mounted on the aft cabin wall.  A mesh hammock hangs beyond.

Somewhere or other, I must have seen a picture of the concept that popped into my head—a suspended sling.  I cannot take credit for designing it, but perhaps a little credit for adding to the idea with an embellishment or two.  The concept is a style of storage that probably has its’ origins in the use of an apron to hold a bunch of apples or in the the use of a hammock to hold anything that must be kept up off the floor.  A sling is a very simple concept.
Opening one of the PermaLock fasteners

After measuring that bare aft cabin hull wall, I set out to make a wall-mounted sling that would be able to contain the above mentioned items and would not use up the entire wall either.  I decided to make a sling that would measure  42” X 54”.  Because I acquired some large scraps of Sunbrella and Pfiftertex when I was last in Annapolis, I had a lot of the necessary supplies on hand.  What I did not have were the kind of fasteners that would attach the sling to the wood paneling of the hull—fasteners that can be twisted to open one side of the roll as it hangs. SailRite had the answer for that; Permalock Fasteners that are designed to attach cloth to a hard surface.  I had them delivered to us in Florida, when I knew we would be in one spot for a week or so.  These are nifty little pieces of hardware.  
PermaLock fastener

One side of the sling (42” side) is permanently mounted on the wall using the Permalock Fasteners. The 54" sling then falls to the bed below and the opposite end of the sling is then lifted up and reattached to the wall using those same fasteners, making a 27 inch-deep sling.  To make the most of the storage space with this sling, I added some external attachments to hold the very long items such as the fishing rod, the spear, boat brush, clothes washing plunger, etc. on the outside of the sling.  My intention was that I would then be able to access those individual, long items without having to open up the entire sling. 

This has turned out to be a very usable space for us.  The sling takes away very little space from the aft cabin since the wall space was “unused” space anyhow.  Because the sling follows the curve of the hull, it hangs above but also away from the surface of the bed so a person can sleep below.  If my guest is claustrophobic, he or she may not like sleeping with these items stored in such close proximity, however, I suspect that someone who is claustrophobic is not going to want to sleep in the aft cabin anyhow.  
Rings, snaps, loops can be attached on the outside

The materials that I used for this sling were:

  • A Pfifertex panel cut to 42” X 54.”  I allowed 1” for folded hems on the two long sides.  
  • Sunbrella strips (4) cut 43" long and 3" wide to encase each short side of the sling.  I added an additional layer of sturdy canvas as stiffener between the two pieces of casing.  These encased shorter ends must be very rugged as they will be attached to the wall.  
  • 9-10 yards of 1” nylon webbing.  Because I knew this sling would be expected to hold a significant amount of weight, I used nylon webbing to stitch 4 lengths (54”) to match up with the fasteners.  I also used 3-4 yards to sew 4 extra lengths of webbing that lie on the outside of the sling. These are adjusted by 4 side-release buckles to accommodate blankets and things with a circumference of up to 24".
  • 4 plastic (1") side-release buckles.  More could have been attached with the nylon webbing if desired.
  • 4 Permalock Fasteners.  If the sling were any wider, I’d have wanted to use more Permalock Fasteners. 

  • Scraps of clear vinyl (20 gauge) — I used 4 squares of it to make “windows” so that I can see what’s rolled up inside of the sling without taking it down.
  • 4 plastic rings, attached across the length of the pack.  Long lightweight items can be attached at those as needed.


Here’s to making the most of boat space…Cheers and Happy New Year.
The sling and aft cabin are loaded with supplies for the Bahamas
*Loos gauge - a tool designed to measure the tension of cables/rigging. 
**pigstick - a homemade stick that can be pulled up the mast to extend above the height of the mast. If the pigstick makes contact with the underside of a bridge, the boat is not going under.  

Sunday, November 27, 2016

Shoes, Shoes, SHOES!


Northern Star living area, stateroom beyond

I like shoes.  I really don’t have occasion to wear all the various styles of shoes that I wore while living on land, but I still like to have a few pair with me onboard. Some people might tell you that I have too many shoes onboard, but that is a discussion for another time, maybe. (Or maybe not.)   
Keens--my most comfortable shoes

It is entirely justifiable, in my opinion, to have shoes onboard for the following purposes:  sturdy hiking shoes for cooler days on land or water (Keens--check); 

Chacos--great arch support and perfect for hiking or water.
walking sandals with great arch support that can be worn in the water (Chacos--check); slip-on loafer boat shoes when neither of the above pair is appropriate (Sperry--check);
Note my foot wearing a slip-on loafer boat shoe
sneakers for exercising (Balance, check); comfy all-vinyl shoes to wear to the shower or when washing down the boat or Jax (Crocs--check); and little black sandals to wear with a sundress (also Crocs--check).  And, I have a pair that I would wear if I were to make an unplanned trip to see family in the winter—the shoes that could be worn on the plane with wool socks, and be appropriate in Minnesota in January (Bass--check.)  

Rain boots are necessary, not fun
Of course, we each have a pair of rain boots which are required sailboat gear so they don’t "count" as shoes.  We also each have a pair of fins, which are really beyond the scope of this discussion about shoes. (Okay, and I’ll admit that I do have another couple of pair onboard which I really can’t justify, but I didn’t know that I couldn’t justify them at the time I brought them onboard, so they have to be tucked away, too.)


We both have Crocs
The problem boils down to space.  Boats have a finite amount of space.  And shoes tend to be bulky.  I have scoured out the easily usable spaces where shoes can be tucked away.  The “winter shoes” lie on the floor of our hanging locker.  The rain boots live in our shower when we are not using it, which is frankly 99% of the time. All the other shoes need their own places to belong.  On a sailboat, every item needs its’ own home.  When the boat heels (no pun intended) things tend to move around, sometimes quite abruptly, so it’s important to be able to put things in their place.

Available walking space in stateroom
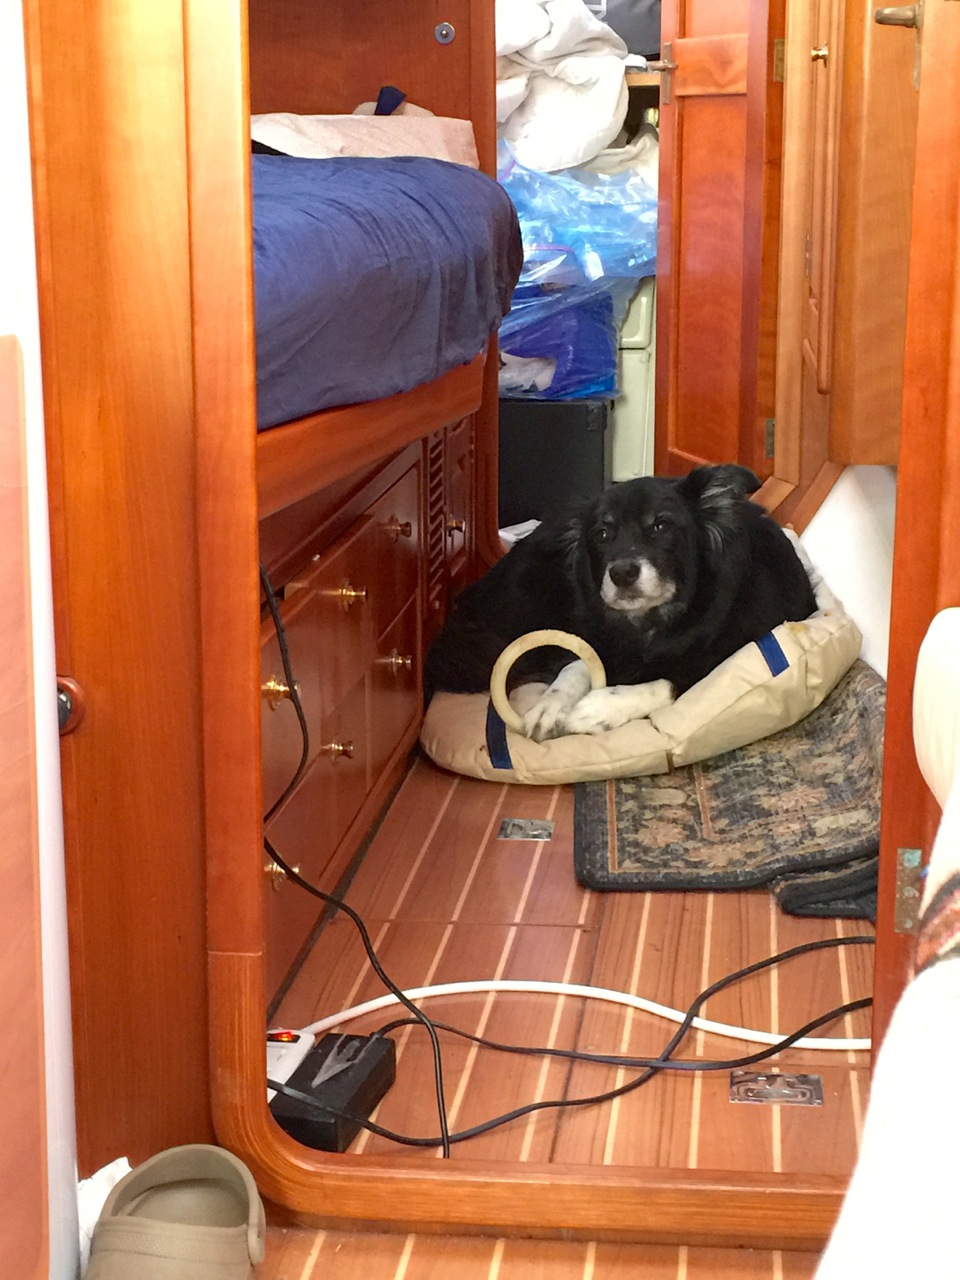
Shoes tend to end up everywhere--under the table, under the nav (navigation) station, scattered in the cockpit, kicked off beside the bed; you get the picture.   The ones that get kicked off before climbing into bed tend to cover the available walking space on the floor.  Between the shoes and Jax lying beside the bed, walking can be precarious.  Shoes need to be contained. 
Shoes got shoved against the hull

About a year into this adventure, I had an "ah HA" moment.  I found an underutilized space in our stateroom.  Underutilized because it’s sort of part floor and part wall—a space underneath a cabinet at a 45 degree angle due to the shape of the hull.  Since we can’t walk on a 45 degree angle, it’s kind of useless space.  For a long time, I’ve shoved our shoes up against that 45 degree angle which works as long as the boat is level.  Then, it dawned on me.  That would become a permanent shoe storage place, at least for several pairs of them if only I could make them stay put.  
Between the bed and cabinets there are shoes and Jax


When I measured the area (16" from floor to bottom of the cabinet) it was tall enough for my husband’s larger shoes to fit lengthwise up and down.  And wide enough (28") for five to six pair of shoes stacked alongside one another.  Great!  I just needed to make a large "pocket" that would be attached to the wall.  I would cut the fabric front and back larger than what I wanted the finished product to be.  When the pocket is filled with shoes it will of course, expand outward which will then shorten the overall length of the pocket. This may be quite obvious to everyone else, but I had to think this through to make the most use of my available space. 
Shoes stay put in this "pocket", attached to the hull below the cabinet.
I didn't want the fabric of the shoe pocket to rest on the floor where it would just collect dust and dog hair, so I left the bottom edge open enough to allow for the heels of the shoes to slide in and rest on the floor rather than the pocket itself. 

Bungee is threaded through a sleeve on the back, against the hull. 
I am a big fan of Pfifertex.  Pfifertex is a manmade fabric available through SailRite.  It is designed for outdoor uses.  I used it to make the shade panels around our cockpit. The denser weave is called 90% coverage, and the looser weave is 70%.  I had the 70% weave on hand.  This seemed like a good choice for the fabric because Pfifertex can be washed down, scrubbed, sprayed with bleach water to kill and prevent mildew and it’s really durable. 

Cockpit shade panels

The design I came up with is quite simple. Essentially, it’s a pocket with 6 grommets spaced across the front and a sleeve across the back where one continuous bungee cord threads through.  
Diagram of the "pattern"

The front and back are sewn together on the short ends, and are connected on the bottom by 4 or 5 (4") Pfifertex strips sewn to each bottom. These open up the bottom enough for the heels of the shoes to poke through to rest against the floor. Additionally, this allows for more air circulation which is helpful in high humidity. 
One continuous bungee threads all the way around

On each end of the hanging pocket, I mounted a pad eye to the boat. The bungee cord hooks to one pad eye, slides through the sleeve across the back of the pocket, through the other pad eye and then back across the front through the grommets and hooks back onto the first pad eye.  Having one continuous bungee cord makes it easy to pull it out toward myself so I can see the shoes in there, and to make it easy to shove other shoes in there. Voila’.
Six large grommets are spaced across the front of the shoe pocket.  

A woman’s gotta have her shoes.

I’ve made some other little space-conserving projects too, which I’ll write about soon.   


Saturday, November 12, 2016

The "Look" that Launched Curtains

Our new curtains, made with fabric from SailRite.

I read in a novel many years ago (maybe it was ShoGun) how the people of Japan have been accustomed to living in very close quarters with one another and with only paper walls between them, no less.  Therefore, in order to maintain a sense of privacy, each person restricted their attention to one’s own living space.  You simply would not “hear” what was produced on the other side of the wall.  And certainly, you wouldn’t look into someone else’s living space. That would invade the neighbor’s privacy.  In some small ways, I think I have adopted that sense of finding my own private spaces.  
We had a little work done on our boat at this marina in Connecticut.

And then we moved onto a sailboat.  When we’re at a slip in a marina, we may very well have another boat close alongside on both sides of our boat.  They have windows—we have windows.  When the boats are of similar size, the windows often kind of line up.  As a matter of privacy, I don’t look into other boaters' windows (unless the boat is an enormous yacht in which case, I figure they WANT you to gawk) and I trust that nobody is purposely looking into mine.  At night, the boat’s interior is well lit, but like on land, it doesn’t really bother me too much to think that someone might casually glance through the window as they drive or walk past. 
Carl really liked the shades on our friends' boat.

My husband apparently did not read the same novel about Japanese privacy that I did.  He is, I would say, fairly bothered by the notion of someone being able to see into our windows.  Not all of the boat’s windows produce this concern for him, however.  The windows in our stateroom, where we change clothes and sleep are not problematic for him.  They’re small portholes and without the lights turned on, you really can’t see inside the boat.  With our galley and head the portholes are a bit larger but still not problematic, by his way of thinking.  
Our stateroom with two small portholes, one on each side.

However, the windows in the main salon of the boat, where we spend the bulk of our time onboard—those are long windows that extend the length of the settees. Since we moved onboard, Carl has occasionally made noises about ‘Are you planning to make curtains for the boat?’  My reciprocal response has been ‘No, not really,’ because I’m thinking ShoGun, right?  Well, this “noise” became more insistent a couple of months ago.  
These two long windows are the ones that "need curtains" per Carl

We were in a slip at a marina in Connecticut, surrounded by boaters who were primarily not live-aboards.  I mention that fact only to offer that perhaps their privacy meters may be “set” a little differently from live-aboards.  Not sure about that— just throwin’ it out there.  
Celebration included boat parade

Anyway, there was a celebration that weekend and lots of people were on the docks.  The large power boat next to us was hosting a family of guests, I presumed the younger ones were their grandchildren. 

Carl is really good about introducing himself to the people that we meet on the docks.  If nothing else, somebody will invariably want to know about Jax. ‘Oh, what a beautiful dog!  What kind of dog is that?’ and the conversation is off and running.  Such conversation had already taken place with the next door neighbors.  
Jax, forever popular on the docks

The owner of said boat adjacent to ours was a fastidious man.  There was lots of cleaning, polishing, etc. going on over there. We, on the other hand, were not hosting any guests, and were decidedly not cleaning and polishing over on our side of the dock.  I mention this fact only to allow as how he might have wondered if we had any friends, or whether we might be slobs, who knows?  At any rate, this gentleman made the gaff of looking into our window.  
We're "okay" with no curtains on these portholes

You’re wondering, ‘how do you know he looked into your window?’  I know because my husband suddenly jumped up,  “Ardys, I can’t sit here.  We looked at each other.”  I had not been privy to the shared “look" but apparently they had locked gazes and clearly, it was unacceptable.  I’m like, “Whaaaat?”  “We looked at each other through the window.,” he says.  “I can’t have this.”  He’s pacing within the small confines of our boat now.  “What do I do?”  
Carl's favorite spot for relaxing

Now, in all seriousness, is this not hysterically funny?  Two grown men make eye contact across the dock, one is inside his boat, the other outside his boat (I’m hearing strains of “Some Enchanted Evening”) and one of them is bothered enough by this that he can’t figure out what to do about it, but clearly something must be done and done now.  My husband was not going to be able to sit down again until this “problem” was addressed.  It was I who was being called into action to fix the problem.  Since I’m leaning more toward ShoGun “rules” I did think this was an unfair expectation on his part.  But okay, I rigged a cloth across the window so that my husband could sit down again, in privacy.  So... that was my clue that I was going to be making curtains for our boat and sooner, rather than later.  

Random sights driving cross-country
I took all the measurements on the boat and installed the curtain mounting brackets from SailRite before we went on our driving trip to Memphis.  I had the fabric shipped to us in Memphis so that I could sew the curtains during our visit there. 
Love my workhorse SailRite machine

Carl is pleased with the curtains.  It seems his sense of having privacy has been supported enough just by knowing they're there, as an option.  Curious remnant of a tune still in my head, though….Some Enchanted Evening……

Wednesday, July 6, 2016

The Making of the Dinghy Chaps


Chaps covering our dinghy
 The sun was really hard on our dinghy during the winter in the Bahamas.  I ordered the materials I would need to make dinghy chaps from SailRite before we flew off to visit two of our children in Portland, OR.  The packages were waiting for me when we returned.  I spent more than a few hours watching and re-watching instructional videos by SailRite about how to make dinghy chaps.  I would otherwise, not have had a clue about how to begin.  
I worked underneath a marina shed the first weekend

Obviously, the dinghy had to come out of the water for me to work on it.  I had to be able to walk around the dinghy and get in and out of it multiple times as I worked.  This news seemed to come as a bit of a surprise to Carl.  Detaching the 18 HP 2 stroke Tohatsu from the dinghy and schlepping it up onto the dock had been further down on his list of things to do.  But I would need all the time I could get to work on the chaps, so up the motor came and the dinghy went to rest on land. 
Using a Hot Knife to cut and cauterize the Sunbrella

Per SailRite recommendations, I used12 gauge Plastipane vinyl for the patterning, chosen for its’ clingy quality.  It tends to stay put when draped over the dinghy tubes, allowing me to see through it and make marks right on the dinghy. I cut the pieces out on a makeshift plywood table set up out in the boatyard, and labeled each piece whether for starboard or port, etc.  
Clear vinyl allows one to mark on the dinghy

The most difficult and time-consuming part about making dinghy chaps, I discovered, however, was making and sewing on the cutouts that surround each protrusion on the dinghy…..handles, oar locks, air locks, and so on.  There were 17 of those.  In addition, where the stern meets with the tube needed reinforcing as did the area inside where the chaps needed to fit up and over the locker at the bow.  

Second worksite--open boatyard
I commandeered one of the tables under the covered patio at the marina where I had plenty of room to work and set up my SailRite machine.  On days when there was a breeze, it was downright pleasant.  A lot of people had asked me what I was doing while patterning.  I’m sure I was a bit of a curiosity—“the lady over there playing with clear sheets of plastic and hopping in and out of the dinghy” on land, no less.  

The curves of the hypilon tubes made a few wedge inserts necessary.
When I started actually sewing, however, passersby could see what I was doing.  I attracted a lot of attention then.  A good share of the people coming to the marina walked through or beside the covered patio.   As the project progressed, the inquiries became more frequent.  “Do you make dodgers?  Can you repair a ripped canvas?  Can you reupholster our boat cushions?”  
Work station under covered patio overlooking the water.


After a healthy start on the sewing, my trusty SailRite LSZ-1 sewing machine went out of timing.  Car engines go out of timing—so do sewing machines.   I was able to troubleshoot enough to figure out that indeed, it was the timing that was the problem, however, did not dare to adjust it myself.  Sigh.
Fitting the pieces together.  Dinghy resting on boatyard train tracks.

I requested the sewing machine shop to allow me to be present when the technician adjusted the timing, so that I could learn more about the machine, given that we won’t always be within shot of a place to bring the machine if we’re in the Caribbean or some such far away place.  “Oh, no, the technician has years of experience and could not teach you that.”   This was quite annoying to me.  We have paid various specialists over the past year to teach us about our sailboat engine, our plumbing system, electronics systems, refrigeration, and so forth.  I totally reject the notion that I would be unable to learn anything useful from the technician.  Hmph!
My view from my sewing area, at dusk.  I was still sewing.

Covered up my machine to protect it from rain and rode out the storm.
A week later, I had the machine back.  Unfortunately, it was still not sewing properly.  So I began an email conversation with the SailRite specialist in Indiana.   He was able to diagnose the problem by looking at the photo of the stitches that I sent him.  
Rub rail is protected by a heavy vinyl fabric.  

With the help from SailRite I was able to troubleshoot further and once again have my trusty SailRite back in good working order.  Part of the problem was due to the slippery quality of the lifetime thread that I was using, called Profilen.  $129 for one spool!  It will not decompose in the tropics.  I couldn’t even burn it using my HotKnife!  Amazing stuff! 
Snap is connected to a Snad, attached to the hypilon.

The entire project took me what seemed like forever.  Of course, it would have been much faster had I not made a critical mistake with the patterning at the beginning and lost the use of my sewing machine for 10 days when the timing went out.  That cost me a lot of time.   On the plus side, I know I could start a business in Annapolis repairing canvas.  The locals charge $75 - $85/hour, but there are not enough people willing to do repairs.  Maybe I’ll pick up some jobs when we return to Annapolis in the fall.
Leech line is tied to the front of the dinghy.

The dinghy chaps were officially finished on Sunday, July 3.  We then cinched up the leech line below the rub rail to hold it on tight, as well as cinching it down tight at the front from the line exposed between two grommets.  I applied G-Flex (Carl’s miracle adhesive) to 10 sites on the inside of the dinghy tubes and applied what SailRite calls Snads—flexible snaps that adhere to the hypilon tubes.  We got some help to launch the dinghy (shoulda done that getting the dinghy OUT of the water too) from the Capital Stand Up Paddle guys and I very inexpertly rowed the dinghy back to Northern Star.  
Leech line is pulled taut, encasing dinghy below rub rail.

It was at that joyous moment of accomplishment that Carl discovered that our dinghy motor that had been waiting innocently for us on the dock, was in fact, toast.  Will these surprises never end?   Cutting to the chase, he was fortunate to find a used 15 HP 2 stroke Yamaha on Craig’s List which he purchased and installed yesterday, at the same time christening the new dinghy chaps with a few greasy fingerprints, to boot.  This morning, I applied the adhesive registration numbers and voila—we have a functioning dinghy once again.
Final touch,  registration numbers.


Planning to head north tomorrow morning toward Maine.  Looking forward to some cooler breezes.  93 and humid in Annapolis today.  Surely, somewhere on the East Coast there’s a cooler summer to be had and we're going to find it.