 |
| Chaps covering our dinghy |
The sun was really hard on our dinghy during the winter in the Bahamas. I ordered the materials I would need to make dinghy chaps from SailRite before we flew off to visit two of our children in Portland, OR. The packages were waiting for me when we returned. I spent more than a few hours watching and re-watching instructional videos by SailRite about how to make dinghy chaps. I would otherwise, not have had a clue about how to begin.
 |
| I worked underneath a marina shed the first weekend |
Obviously, the dinghy had to come out of the water for me to work on it. I had to be able to walk around the dinghy and get in and out of it multiple times as I worked. This news seemed to come as a bit of a surprise to Carl. Detaching the 18 HP 2 stroke Tohatsu from the dinghy and schlepping it up onto the dock had been further down on his list of things to do. But I would need all the time I could get to work on the chaps, so up the motor came and the dinghy went to rest on land.
 |
| Using a Hot Knife to cut and cauterize the Sunbrella |
Per SailRite recommendations, I used12 gauge Plastipane vinyl for the patterning, chosen for its’ clingy quality. It tends to stay put when draped over the dinghy tubes, allowing me to see through it and make marks right on the dinghy. I cut the pieces out on a makeshift plywood table set up out in the boatyard, and labeled each piece whether for starboard or port, etc.
 |
| Clear vinyl allows one to mark on the dinghy |
The most difficult and time-consuming part about making dinghy chaps, I discovered, however, was making and sewing on the cutouts that surround each protrusion on the dinghy…..handles, oar locks, air locks, and so on. There were 17 of those. In addition, where the stern meets with the tube needed reinforcing as did the area inside where the chaps needed to fit up and over the locker at the bow.
 |
| Second worksite--open boatyard |
I commandeered one of the tables under the covered patio at the marina where I had plenty of room to work and set up my SailRite machine. On days when there was a breeze, it was downright pleasant. A lot of people had asked me what I was doing while patterning. I’m sure I was a bit of a curiosity—“the lady over there playing with clear sheets of plastic and hopping in and out of the dinghy” on land, no less.
 |
| The curves of the hypilon tubes made a few wedge inserts necessary. |
When I started actually sewing, however, passersby could see what I was doing. I attracted a lot of attention then. A good share of the people coming to the marina walked through or beside the covered patio. As the project progressed, the inquiries became more frequent. “Do you make dodgers? Can you repair a ripped canvas? Can you reupholster our boat cushions?”
 |
| Work station under covered patio overlooking the water. |
After a healthy start on the sewing, my trusty SailRite LSZ-1 sewing machine went out of timing. Car engines go out of timing—so do sewing machines. I was able to troubleshoot enough to figure out that indeed, it was the timing that was the problem, however, did not dare to adjust it myself. Sigh.
 |
| Fitting the pieces together. Dinghy resting on boatyard train tracks. |
I requested the sewing machine shop to allow me to be present when the technician adjusted the timing, so that I could learn more about the machine, given that we won’t always be within shot of a place to bring the machine if we’re in the Caribbean or some such far away place. “Oh, no, the technician has years of experience and could not teach you that.” This was quite annoying to me. We have paid various specialists over the past year to teach us about our sailboat engine, our plumbing system, electronics systems, refrigeration, and so forth. I totally reject the notion that I would be unable to learn anything useful from the technician. Hmph!
 |
| My view from my sewing area, at dusk. I was still sewing. |
 |
| Covered up my machine to protect it from rain and rode out the storm. |
A week later, I had the machine back. Unfortunately, it was still not sewing properly. So I began an email conversation with the SailRite specialist in Indiana. He was able to diagnose the problem by looking at the photo of the stitches that I sent him.
 |
| Rub rail is protected by a heavy vinyl fabric. |
With the help from SailRite I was able to troubleshoot further and once again have my trusty SailRite back in good working order. Part of the problem was due to the slippery quality of the lifetime thread that I was using, called Profilen. $129 for one spool! It will not decompose in the tropics. I couldn’t even burn it using my HotKnife! Amazing stuff!
 |
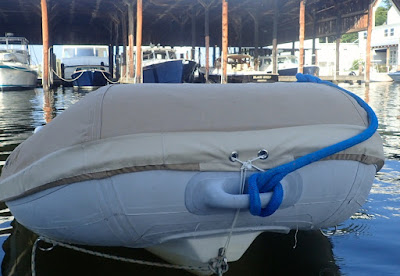
| Snap is connected to a Snad, attached to the hypilon. |
The entire project took me what seemed like forever. Of course, it would have been much faster had I not made a critical mistake with the patterning at the beginning and lost the use of my sewing machine for 10 days when the timing went out. That cost me a lot of time. On the plus side, I know I could start a business in Annapolis repairing canvas. The locals charge $75 - $85/hour, but there are not enough people willing to do repairs. Maybe I’ll pick up some jobs when we return to Annapolis in the fall.
 |
| Leech line is tied to the front of the dinghy. |
The dinghy chaps were officially finished on Sunday, July 3. We then cinched up the leech line below the rub rail to hold it on tight, as well as cinching it down tight at the front from the line exposed between two grommets. I applied G-Flex (Carl’s miracle adhesive) to 10 sites on the inside of the dinghy tubes and applied what SailRite calls Snads—flexible snaps that adhere to the hypilon tubes. We got some help to launch the dinghy (shoulda done that getting the dinghy OUT of the water too) from the Capital Stand Up Paddle guys and I very inexpertly rowed the dinghy back to Northern Star.
 |
| Leech line is pulled taut, encasing dinghy below rub rail. |
It was at that joyous moment of accomplishment that Carl discovered that our dinghy motor that had been waiting innocently for us on the dock, was in fact, toast. Will these surprises never end? Cutting to the chase, he was fortunate to find a used 15 HP 2 stroke Yamaha on Craig’s List which he purchased and installed yesterday, at the same time christening the new dinghy chaps with a few greasy fingerprints, to boot. This morning, I applied the adhesive registration numbers and voila—we have a functioning dinghy once again.
 |
| Final touch, registration numbers. |
Planning to head north tomorrow morning toward Maine. Looking forward to some cooler breezes. 93 and humid in Annapolis today. Surely, somewhere on the East Coast there’s a cooler summer to be had and we're going to find it.


1 comment:
Great Job, i just made mine this summer as well from Sailrite. I used embroidered numbers and sewed them one as the stick on ones tend to peel off eventually. I used the stick on snaps but some of mine have come off so I have ordered the 3M adhesive promoter and will try again. I love mine and as you, got many questions about other projects from Marine friends about what else I can sew. So up north here in Ontario Canada, I am now making dinghy chaps as we hate putting on those darn dinghy covers as they are a pain in the you know what!! I have many orders for chaps as well as sail repairs, winch covers, and cockpit cushions. Something to keep me busy for the long winter months ahead. Money for our cruising kitty. How do you like your sailrite machine? We are driving down to the Annapolis show this Oct 2016 and will possibly pick one up while we are there and drive it home. You did an awesome job,give yourself a high five!
Take care,
S/V Secondwind
Sandra Renwick
Post a Comment