posted by Ardys
Day 1: Problem and Assessment.
Two weeks ago we discovered more than a gallon of water in the anchor locker of our hard-bottom AB dinghy. The entry point was unclear although the hardware attachments for raising the dinghy were suspicious. My husband motored the dinghy over to the dinghy dock at the marina where we had arrived only the day before, and we pulled it out of the water. After removing the outboard my husband noticed an additional plug low on the stern. When it was removed, water gushed out of the space between the hull and the dinghy floor. "Huh," I thought, "Interesting."
 We turned the dinghy over and found tiny cracks and a few small chips on the prow and along the entire length, which my husband thought would be relatively easy to repair. The anchor locker was another matter, however. The inside edges of the anchor locker were soft to the touch. We took turns pulling and cutting a layer of water logged fiberglass out of the locker until we reached dry edges. Then, we allowed it to dry completely overnight. Anchor lockers on dinghies are small. Without exchanging a word, we knew that it would be my task to apply the epoxy. My husband is 6’5” and I’m 5’10” so my shoulders are narrower. I have never watched anyone repair fiberglass, but I’ve done wall repair and painting so I figured that surely that experience would transfer to working with fiberglass.
None of the ‘how-to’ videos that we found online talked about working inside a small space. All of them demonstrated using big flat surfaces which made it look really easy. It’s great that people make these instructive videos, however, I would have appreciated hearing tips about working inside a space where you cannot see what you are doing.
Tip #1.
Appropriate Attire: I wore a white balaclava-type covering to protect my skin and hair from the fiberglass dust, and leather gloves to protect against sharp edges of broken fiberglass. I wore a respirator mask, of course and protective eye gear. Thankfully, the air temperature was only in the 70’s because that get-up was hot, and it was difficult to breathe, especially when my lungs were constricted by cranking my torso into a modified pretzel.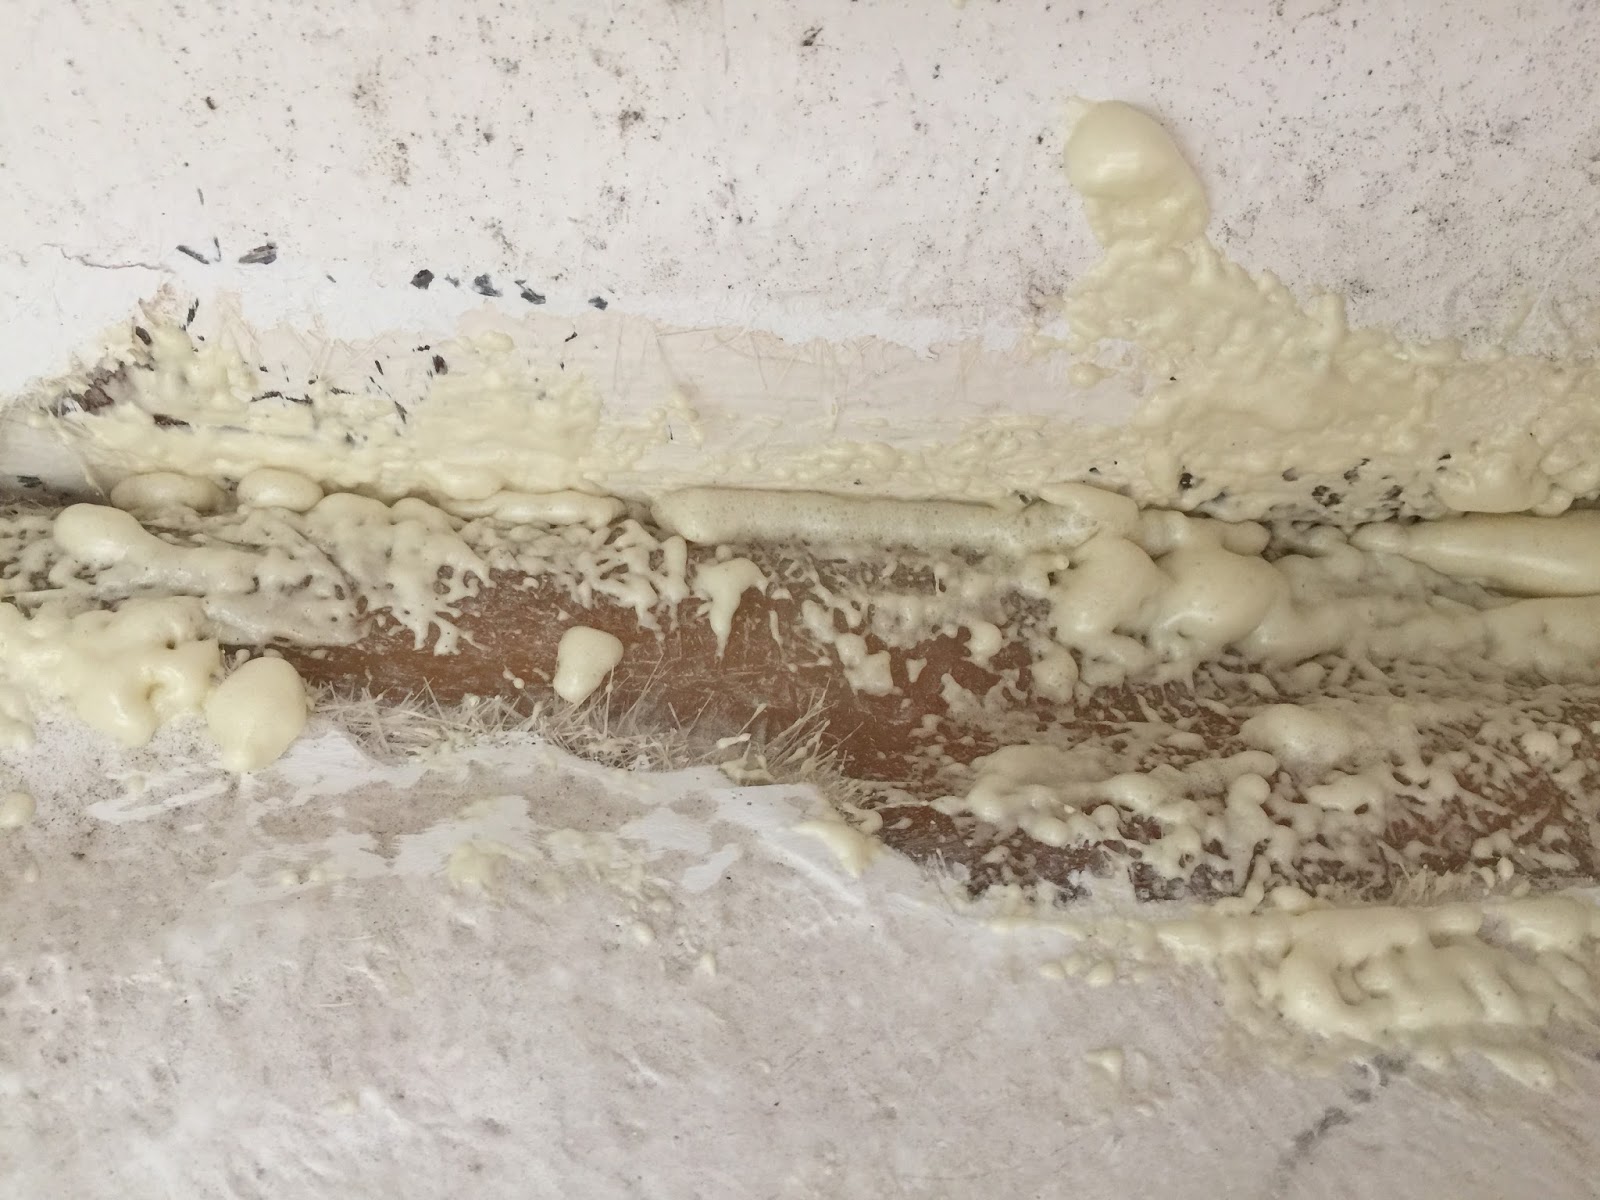
Day 2: Preparing the anchor locker. I cleaned the area with isopropyl alcohol and then sanded at least a couple inches on either side of the area where epoxy would be applied. We didn't bring our orbital sander with us when we moved onto the boat, so I used a drill sander for the area directly beneath the hatch opening. I used the sander on our Dremel to reach in farther to get rid of sharp fiberglass edges and then sanded the rest by hand. Then I wiped the area clean with a paper towel and water. Finally, I used a spray foam product to fill in the largest of the gaps exposed when the wet fiberglass was removed.
Tip #2
Fiberglass fabric: I learned several things about fiberglass fabric. It comes in different weights--6 oz, 9 oz and so on. There are different types too. What is called fiberglass “mat” comes in big sheets and because it was least expensive, that is what we bought initially. I was sorry we did. When I unfolded it, the fibers immediately began to shred apart and that only got worse when I cut into it. So we put that aside and bought fiberglass “fabric.” Fiberglass “fabric” comes in sheets, too, that can be cut to the shape desired. It also unravels easily but not like the mat. By far the most annoying aspect of this project was the tendency of the fabric to release long strings especially when wet. I ended up cutting them off some of them even while I was trying to lay it down. Yuck. Then there is fiberglass “tape” which comes in specific widths (4”, 6" and so on). It can be purchased in pre-packaged amounts and off the roll by the footSince the tape is already cut, it unravels much less than the fabric. My husband bought that to repair the hull of the dinghy. 
Day 3: Supplies purchased.
We chose a resin and a hardener. When mixed together in very accurate proportions the combination causes the liquids to become hard. I chose a hardener that allows a little more leeway for work time. We also bought a thickener to add to the epoxy. We needed tongue depressor sticks, plastic cups, a Mini-Pump set and vinyl gloves. Finally we needed fiberglass fabric to make the new “skin” of fiberglass inside the anchor locker.

Tip #3
Why it's best to work with a partner: My husband was in charge of mixing the resin with the hardener in very small amounts because the pot life of the mixture is short, as in minutes. He handed me a small batch and while I applied the epoxy, he mixed a second small pot of epoxy for me. It was hard to judge how far the batch would go, so small batches worked the best. If I had been doing all of this by myself, I would have had to unfold my body every time to get out of the dinghy, mix the epoxy and then step back into the dinghy and get my body to crumple down again without putting my sticky hands or the wet fabric on anything but the interior of the locker. Very difficult.
Day 4: Applying Epoxy.
I cut the fiberglass cloth into several small pieces (none larger than 8" X 12". I thought those would be of reasonable size to manage after they were wet with epoxy. In such a small enclosed workspace. it seemed that the smaller the pieces were, the better. For the next part it was very helpful to have a partner. See Tip #3. I “painted” the epoxy over the area where I would apply the fiberglass fabric. |
| Cut away excess foam and cleaned surface again. |
We waited for the "painted" epoxy to become tacky. Frankly, tackiness is difficult to assess when rubber-gloved fingers are already sticky. When it seemed likely that it WAS tacky, my husband handed me the wet epoxy pieces in the order I desired. The most difficult part of this project was that most of the time, I could not see what my hand was doing inside the locker. Either my arm OR my head would fit inside, but not both at the same time. Periodically, I checked my work by putting my head inside the locker which resulted in some epoxy in my hair. I did not wear all of that protective gear after the sanding was done. FYI: Epoxy in hair needs to be cut out by a trusted partner. Cover your hair.
Tip #4
Planning ahead: It is preferable to do all the epoxy work in the same day. That way, you don’t have to re-sand and clean the surface again before the next layer. Therefore, start early in the day and allow the entire day to complete all the steps.
Day 5: Assessing the Epoxy Cure.
Checking the epoxy we found it was not yet rock hard. A few sharp edges of fiberglass fabric were poking out however, a potential hazard for anyone reaching into the locker to retrieve something. My husband applied some G-Flex (a magical squeeze bottle of epoxy) and filled in those “dangerous” spots. We would wait another day to proceed further.
Day 6: Painting the Anchor Locker.
The plan had been for my husband to return to the dinghy alone, to paint the anchor locker. He was delayed by workmen on our boat, so I painted the inside of the anchor locker with bilge paint—super shiny white paint which looks wet when dry!
Day 7: Preparing the Bottom of the Dinghy. Together we turned the dinghy over in order to prep the bottom for sanding and repair. First we cleaned the bottom, thoroughly. We had agreed that my husband would finish the rest of this job by himself. After all, the outside of the dinghy provided plenty of working room, even for a 6’5” man. By late morning, however, I was struck with a feeling of knowledgeable smugness which is, I'm sure, seldom appreciated by the spouse doing the work. I decided to offer a cameo appearance over at the dinghy dock. He had purchased a small orbital sander. ("Hmmm, I coulda used that sander several days ago.") He sanded the length of the spine of the dinghy and about 2 inches beyond our intended epoxy area.

He repeated the steps described on Day 4 except that this time, he applied the fiberglass fabric “dry” onto the tacky area after painting on the epoxy. My husband became convinced that I am better at fine detail work and when I suggested that I apply the final epoxy to the strips of cloth he had laid down, he readily agreed. Before leaving for the day, we tented a tarp over the dinghy to prevent leaves from falling onto the tacky surface.
Day 8: Tired of Dinghy Work.
Went to the Annapolis Sailboat Show. Awesome.Day 9: Final Sanding.
I used the newly purchased sander to smooth the fiberglass on the hull. First with 80 grit and then 120 grit—a much preferable task to sanding inside the anchor locker. After consulting a couple of people at the Annapolis Boat Show yesterday, we determined that it was unnecessary to paint over the new fiberglass.
No comments:
Post a Comment